

How-To Benefit From Digital CAD/CAM Veneers For Same-Day Smile Results
You can achieve precise, natural-looking restorations in a single visit using digital CAD/CAM veneers; learn how to plan scans, select materials, and expedite milling and bonding to deliver predictable same-day smile transformations with clinical efficiency.
Understanding CAD/CAM Technology for Veneers
You benefit from CAD/CAM when digital design, milling, and glazing are completed chairside, letting you receive custom-fit veneers in a single visit with predictable fit, shade matching, and conservative preparations.
The role of 3D intraoral scanning in digital impressions
Scanners capture precise 3D data in seconds, giving you instant digital impressions that replace traditional trays, speed planning, and improve communication with the mill for same-day fabrication.
Precision milling and the selection of high-grade ceramics
Milling translates the CAD model into sub-millimeter accuracy so you receive veneers that fit tightly, respect occlusion, and require minimal chairside adjustment; ceramic selection then defines strength and translucency.
Ceramics such as lithium disilicate, feldspathic porcelain, and high-translucency zirconia offer different balances of esthetics and strength; you should choose based on esthetic demands, occlusal load, and required finish-sintering, staining, glazing, and careful polishing determine final shade, longevity, and the need for bonding or surface treatments.
How-to Prepare for Your Same-Day Smile Transformation
Plan to arrive with recent dental records, a list of medications, and clear expectations for shade and shape. You should fast only if sedation is planned, wear minimal lipstick for accurate mock-ups, and arrange post-appointment transport if needed, which speeds digital scanning and same-day fabrication.
Initial consultation and digital smile design mapping
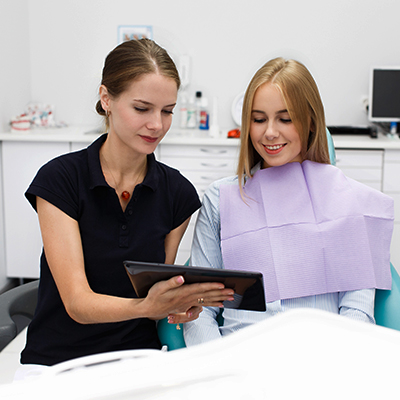
During your consult, share goals and medical details while the clinician captures intraoral scans and facial photos for the digital smile mock-up. You will review proposed shapes, proportions, and shade options on-screen and approve the design before fabrication begins.
Managing the chairside fabrication and bonding process
Expect milling, try-in, minor adjustments, and adhesive bonding in a single visit; you will confirm shade and fit, then the clinician will etch, bond, cure, and polish the veneers for immediate function and aesthetics.
Check that local anesthetic and proper isolation (rubber dam or retraction) are used to protect bonding surfaces. The workflow moves from intraoral scanning and CAD tweaks to CAM milling or printing, temporary try-in, occlusal adjustment, then meticulous etching, primer/adhesive application, controlled light-curing, and final polish; you will receive post-op care and a short follow-up to confirm fit and comfort.
Critical Factors Determining the Success of Digital Restorations
Clinical precision in scanning, material choice and fit determine your veneers’ longevity.
- Accurate digital scan
- Appropriate ceramic or composite
- Consistent preparation and bonding
Assume that you follow strict protocols for scanning, milling and cementation.
Material selection for optimal strength and aesthetics
Choose lithium disilicate for strength and lifelike translucency, or nano-ceramic composites for conservative cases; match shade to surrounding teeth under natural light to reduce chairside surprises.
Accurate tooth preparation for seamless veneer integration
Prepare your teeth with uniform reduction to preserve enamel for bonding, define finish lines precisely and confirm path of insertion to ensure accurate seating of restorations.
Precise depth guides, minimal taper and strict enamel preservation maximize bond strength; you should follow recommended reductions (about 0.3-0.7 mm facial, 0.5-1.5 mm incisal as needed), place margins in enamel at the gingival third, protect interproximal contacts, verify occlusal clearance, then scan and perform a try-in to confirm fit and esthetics before final cementation.
Expert Tips for Maintaining Your Digital Veneers
Adhere to gentle brushing, flossing with interdental aids, and routine checkups to maintain margins and shine. Any signs of chips, looseness, or sensitivity require prompt contact with your dentist.
- Brush with a soft-bristled brush and non-abrasive toothpaste.
- Floss daily using a threader or interdental brush to protect margins.
- Attend routine checkups for glazing touch-ups and occlusal adjustments.
Implementing specialized hygiene practices for ceramic surfaces
Use non-abrasive cleansers, a soft toothbrush, and alcohol-free rinses to preserve glaze; you should avoid abrasive powders and vigorous scrubbing that create micro-scratches.
Protecting your investment from mechanical stress and wear
Avoid biting hard objects, chewing ice, or using teeth as tools; obtain a custom nightguard if you clench to reduce fracture risk.
Consider periodic occlusal assessments and a hard acrylic nightguard to redistribute forces; you should address minor chips early, opt for in-office polishing or reglazing, and limit very hard or sticky foods to extend veneer service life.
How-to Choose the Right Shade and Translucency
Choose the ideal shade and translucency by evaluating surrounding teeth under natural light, considering skin tone and smile line, and discussing options with your clinician so your digital veneers blend naturally with your existing dentition.
Matching digital designs to natural tooth color
Compare digital shade maps to physical samples and submit photographs with shade tabs so your lab matches hue, chroma, and value; you should approve mockups before milling to avoid surprises.
Utilizing software previews for predictable aesthetic results
Preview software renders let you see translucency, brightness and texture together, enabling you to request adjustments to shade, opacity, or layering before the mill-saving chair time and improving predictability.
When you use software previews, you can assess shade, translucency gradients, incisal characterization and gingival blending in the context of facial photos or intraoral scans. You can toggle lighting, opacity and material presets to observe how light transmits through layers and alters perceived color. Ask your clinician to produce multiple layered simulations and a signed digital mockup the lab follows to ensure same-day veneers meet your expectations.
Evaluating the Advantages of Digital vs. Traditional Workflows
You can compare precision, turnaround, and predictability between digital CAD/CAM and traditional lab workflows to decide which delivers faster, more consistent same-day veneer outcomes.
Eliminating the need for temporary veneers and multiple visits
Same-day digital fabrication lets you skip temporary veneers and multiple visits, providing a final, durable restoration in a single appointment.
Enhancing patient comfort through non-invasive scanning
Non-invasive intraoral scanning reduces gagging and impression discomfort so you experience quicker, calmer appointments while maintaining precise digital impressions for veneer design.
Scanning captures highly accurate 3D data without impression trays, allowing you to preview restorations, approve shade and shape, and shorten clinical and lab steps for same-day delivery.
Summing up
To wrap up, you can achieve same-day smile results with digital CAD/CAM veneers by using precise intraoral scans, in-office milling, and clinician-guided customization, giving faster treatment, accurate fit, predictable esthetics, and long-term durability when you follow proper bonding and follow-up care.